Getting Started
Set up prerequisites, install Gi, and run the Widgets example.
Prerequisites
On all platforms, you must download and install Go from the Go website if you do not already have Go 1.18+ installed.
MacOS
- Install the xcode command-line tools if you don’t already have them by running
xcode-select --install - If you don’t already have the Vulkan SDK installed, install it by doing the following:
- Run
curl -O https://sdk.lunarg.com/sdk/download/latest/mac/vulkan_sdk.dmg - Run
open vulkan_sdk.dmg - Double click
InstallVulkan.app - Follow the installation prompts and ignore all warnings about the Vulkan Portability Enumeration extension
Windows
- Download and install Git for Windows from the git website if you don’t already have it. You should install Git Bash as part of this process and use it for development.
- Download and install TDM-GCC from this website
- Open Windows Command Prompt and run
cd C:\TDM-GCC-64 - Then, run
mingwvars.bat
Linux
- If you are on Ubuntu or Debian, run
sudo apt-get install libgl1-mesa-dev xorg-dev - If you are on CentOS or Fedora, run
sudo dnf install libX11-devel libXcursor-devel libXrandr-devel libXinerama-devel mesa-libGL-devel libXi-devel libXxf86vm-devel
Installation
Clone the Gi repository by running git clone https://github.com/goki/gi
Try it out!
- Navigate to the widgets example by running
cd gi/examples/widgets - Build the widgets example by running
go build - Run the widgets example by running
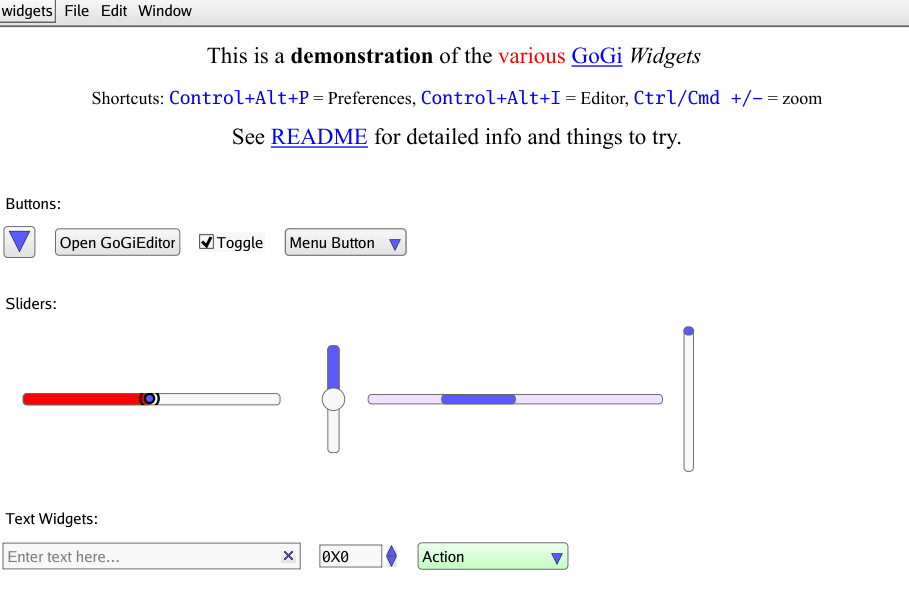
./widgets if you are on MacOS or Linux and ./widgets.exe if you are on Windows. This should create a window with a variety of widgets, similar to the screenshot below:
1 - Hello World
Create a simple Hello World example app with Gi.
Create a new Go project
- Navigate back to your home directory by running
cd - Create a new directory called myapp by running
mkdir myapp - Navigate to your newly created directory by running
cd myapp - Create a new Go module by running
go mod init myapp - Create a new Go file by running
touch main.go - Open main.go using an editor of your choice
Make a simple app
Add the following code to your editor:
package main

import (
  "github.com/goki/gi/gi"
  "github.com/goki/gi/gimain"
)

func main() {
  // Run the window event loop function as the main function
  gimain.Main(func() {
    mainrun()
  })
}

func mainrun() {
  // Create a window called My App Window with width 512 and height 384
  win := gi.NewMainWindow("myapp", "My App Window", 512, 384)
  // Get the viewport within the window
  vp := win.WinViewport2D()
  // Start a protect update on the viewport
  updt := vp.UpdateStart()
  // Create a standard frame within the window and make it the main widget
  mfr := win.SetMainFrame()

  // Add a label to the main frame with the text "Hello, World!"
  label := gi.AddNewLabel(mfr, "label", "Hello, World!")
  // Make the font size of the label large
  label.SetProp("font-size", "large")

  // End the protected update on the viewport without a signal.
  // Update signals cause things to be redrawn, which is unnecessary at the start
  // because it is already drawing everything new.
  vp.UpdateEndNoSig(updt)
  // Start the event loop that keeps the window rendering.
  // This is a blocking call, and it will not return until
  // the user quits the app or gi.Quit() is called
  win.StartEventLoop()
}
Update your dependencies by running go mod tidy
Build the code by running go build
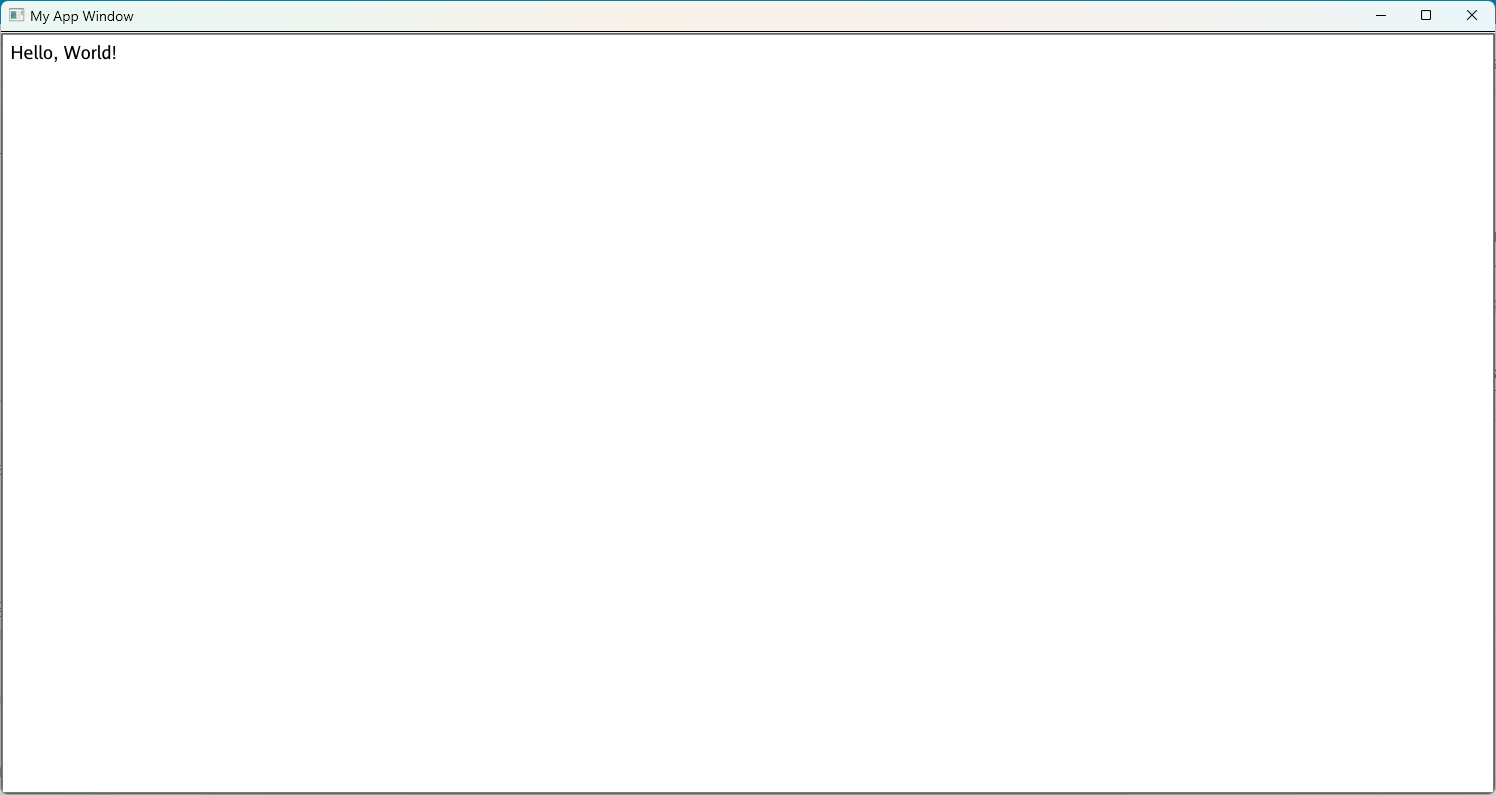
Run the app by running ./myapp if you are on MacOS or Linux and ./myapp.exe if you are on Windows. This should create a window with text that says “Hello, World,” similar to the screenshot below:
2 - Increment
Extend the Hello World example to support incrementing a number by clicking on a button.
In the last section, you built a simple app that says, “Hello, World!” In this section, you will add to that app by creating a button that increments a label. To do that, you need to add the following code after the “Hello, World!” label:
	// Add a new label to the main frame with the text "0"
	// This label will track the number of times the button has been clicked
	numLabel := gi.AddNewLabel(mfr, "numLabel", "0")
	// Make the label redrawable so that it can be updated when the
	// number of times the button has been clicked changes
	numLabel.Redrawable = true
	// Add a new button to the main frame
	button := gi.AddNewButton(mfr, "button")
	// Set the text of the button to "Increment"
	button.Text = "Increment"
	// Keep track of the number of times that the button has been clicked
	numClicked := 0
	// The OnClicked function is called every time the button is clicked
	button.OnClicked(func() {
		// In it, we increment the number of times the button has been clicked
		numClicked++
		// Then, we set the text of the number label to the number of the times
		// the button has been clicked. strconv.Itoa converts integers to strings.
		numLabel.SetText(strconv.Itoa(numClicked))
	})
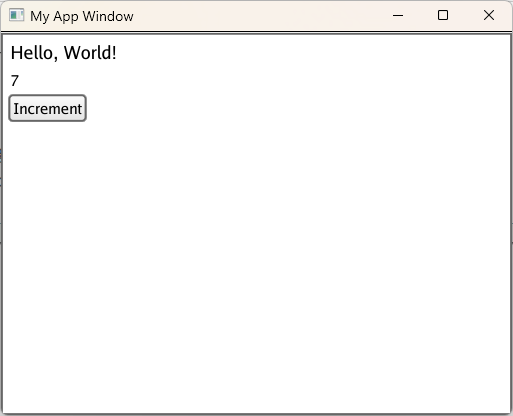
Then, run go build and ./myapp if you are on MacOS or Linux and ./myapp.exe if you are on Windows. This should create a window similar to the last one, except with a new label and button. Each time you click the Increment button, the number in the new label should increase by 1. If you click the button 7 times, the app should look like this: